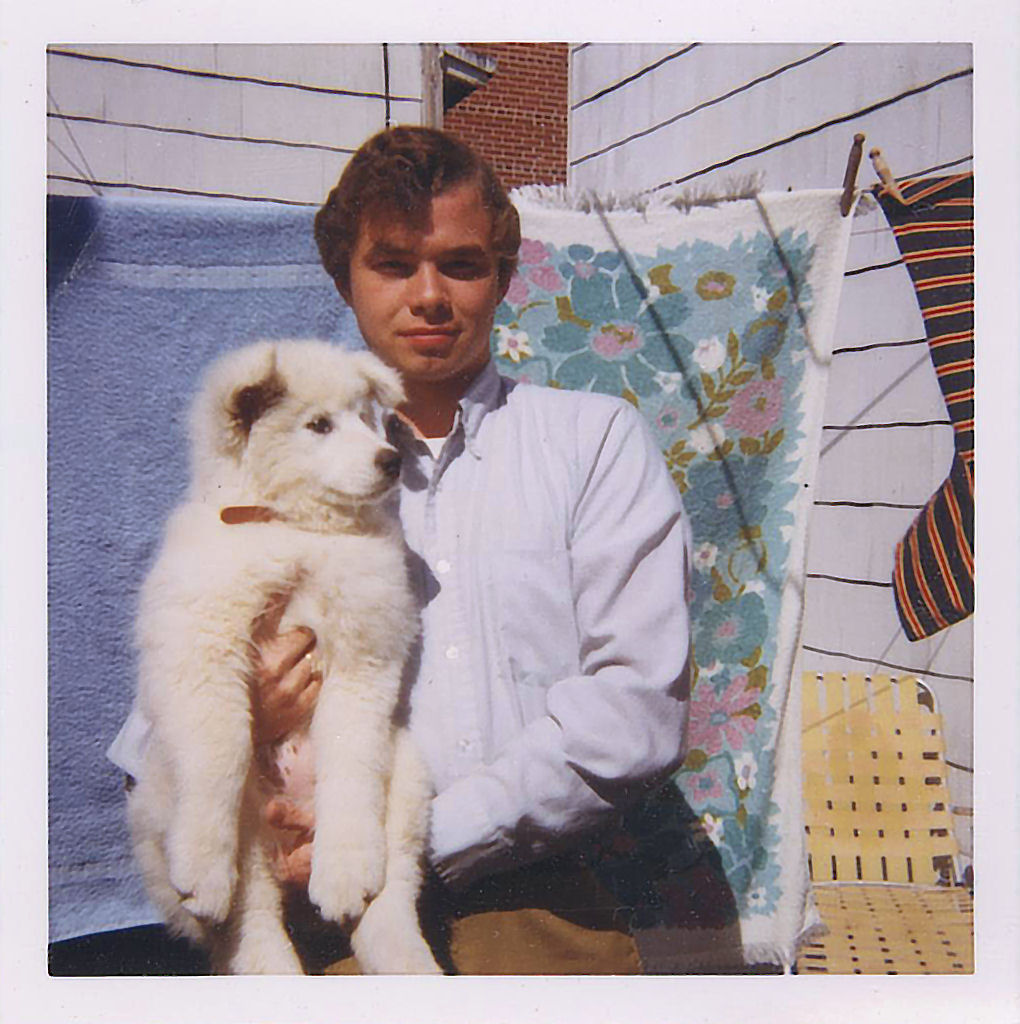
Here's what I did to the photo (attached). Paint Shop Pro version number: 10.01.
1. Rotated (Ctrl+R) it to the right by 0.5 degree so that the upper edge was straight.
The way I could tell the upper edge was straight after the rotation was to temporarily drag a selection marquee across the top edge and see if it approximately lined up.
Since rotating the image tends to soften it a bit, you want to avoid doing this if you can. But the way you've chosen to do the scanning (leaving the pics in the photo album) means you've got much less control over the straightness of the original scan.
By the way, while I'm on the subject: If it were me, I'd take the pics out of the album, or at least peel back the clear plastic covering them, to do the scanning. The clear plastic removes the pictures one level from the scanning glass, thus putting them slightly out of the CCD's focal plan and blurring them ever so slightly. Doing so would also allow you to clean dust and such off of the picture surfaces.
2. Selected the cropping tool and cropped it.
The cropping tool looks almost like a sextant on the toolbar. Once selected, you drag the handles to the desired positions and then double click on the cropped area to finalize it.
3. Color Balance.
Selected Adjust/Color Balance. Selected Advanced Options. Hit "Smart Select". Clicked on a white area of the border in the lefthand preview window. Made sure the additional adjustments at the bottom of the window were centered.
What this did is to tell the color balance algorithm: "Hey. This part of the picture that I just clicked on is supposed to be pure white. Fix the rest of the photo so that any fade or yellowing in this part of the photo gets corrected universally for the whole picture".
4. Sharpness
I do *NOT* use the built-in sharpness features of PSP or any other application. I am a big fan of a third-party plugin called FOCUS MAGIC, which I used on this picture. It brings out detail (such as the puppy fur) without creating particularly bad "halo" effects on sharp areas.
If you don't have Focus Magic, the built-in sharpening tools are worth a shot.
5. Saturation
Adjust/Hue and Saturation/Hue Saturation Lightness. I bumped the saturation by about 15 percent if I recall correctly. I left the other settings at zero.
Before doing most of the above, I had already tried other features of PSP, such as the "Smart Photo Fix", which allowed me to adjust the darkness of the shadows and the whiteness of the highlights, or the "Fade correction" feature which essentially does the same kind of thing. None of these improved the image, and in fact made me lose detail in the shadows and highlights, so I left that part of the tonal balance alone. This photo was scanned with a pretty darn good set of defaults for the brightness and contrast, so any attempts I made at improving those things made it worse.
I know that's a lot of work for 301 photos, though. However, I don't know a way to do all of that automatically and actually have it *work* without possibly making some of the scans worse. There are automatic photo-fix tools built into PSP, but as I discovered, you can't always trust them and you still need to do your corrections by hand if you care about the subject material.
Attachments
272222-restoration.jpg (179 downloads)

 Previous Topic
 Index
Index
